A Guide for RESTful APIs with Node, Sequelize & Postgres
If you’ve landed here, hopefully you’re looking for help getting data flowing from a Node.jsandExpress web application, to a PostgreSQL database with Sequelize as the O.R.M. This guide will assist you with setting up a Node.js project, and installing Sequelize to allow for object relational database mapping between a Postgres database.
The simplest way to think of Object Relational Mapping is as a process for accessing a relational database — Postgres in our instance — from an object-oriented language like JavaScript. Sequelize allows us to interact with a Postgres database using JavaScript instead of SQL.
“Sequelize is a promise-based Node.js ORM for Postgres, MySQL, MariaDB, SQLite and Microsoft SQL Server.” — sequelize.org
Before we get moving, let me lay out the tools we’ll be using. This way you have a high-level sense of what tools you should be knowledgeable of, and what you can expect to extract from this guide.
- Node.js 🎛
- Sequelize 📝
- Postgres 🗄 (I’m using Postgres.app for mac)
- Postico 🔍 (or any DB viewer for Postgres)
- VS Code 💻
- yarn 🧶
Project Dependencies
- express 👂🏼
- dotenv 🔐
- nodemon 🔁
- sequelize-cli 🗺
Prerequisites
To have the most success using this guide you should have a generalcommand of JavaScript. You also need to haveNode.js and PostgreSQL installed on your machine.
💡 Postgres and PostgreSQL are the same thing. This confused me at first, but it’s just industry semantics — although PostgreSQL is the official name.
While my goal is to help you configure Sequelize with Postgres, in the process we will be building a RESTful API. Once we have data flowing properly, you can expand on this app’s build however you’d like — adding more routes or developing the front-end.
Why Postgres?
Those of us who have only dabbled with the back-end, may have done a few tutorials using a non-relational database like MongoDB. And I can attest I’ve learned a ton by using MongoDB with Node.js — seeing data flowing and testing endpoints with Insomnia.
I quickly realized when landing my first engineering gig that it’s imperative to command knowledge of relational DBs (databases). Postgres itself is an “object-relational database system that uses and extends the SQL language,” according to the official website. Its language is designed to perform CRUD (Create, Read, Update, Delete) operations on a database, it scales vertically and can perform complex queries across multiple tables of data.
Sequelize what?
Without Sequelize, we’d have to execute SQL statements in order for us to interact with Postgres and perform CRUD on our databases. Sequelize handles this translation for us, allowing us to interact with a Postgres database using JavaScript instead of SQL.
Setting up a new Sequelize project
Now that we have some context established, let’s get to the code!
For this guide, I’ll be using yarn 🧶. The official Sequelize documentation uses npx_._ We'll create yarn scripts along the way for future developers to join the project. For a full working example, click here (Link to spike with yarn scripts).
Create new directory
Let’s start by creating a new directory for our project, and setting it as our working directory.
Open your terminal, and enter mkdir to create a new directory (empty folder) on your desktop for this project. Change directories cd into the folder that you just created.
mkdir sequelize-app
cd sequelize-app
# Our project's directory name will be sequelize-app
Configure project
Next, we initialize Node.js and create a new package.json file in the root directory of our app by running the command yarn init.
Press enter/RETURN to accept the default set up, although we do want to name our main file app.js instead of index.js.
entry point (index.js): app.js
# You can choose to name this server.js or index.js
# I'll be using app.js
Install the dependencies for this project by running the commands:
yarn add express
yarn add dotenv
yarn add nodemon -D// -D for devDependency
From the terminal, now open your project in VS Code.
code .
With VS Code open, select your package.json file. Add in a "scripts" object, and then add the script below to start our server with nodemon.
"dev": "nodemon -r dotenv/config app.js"
💡 We’ve also added -r dotenv/config to the script so that dotenv is required and pre-loaded. Meaning, we won’t need to require and load dotenv in our application’s code — more on that here.
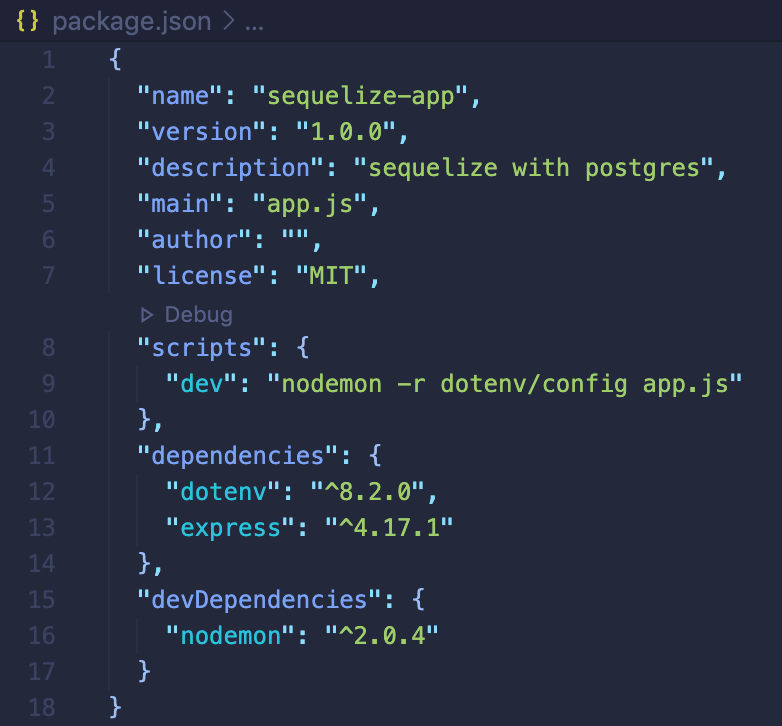
package.json file with initial dependencies and nodemon script
Now we’re set up to run our application by simply using the yarn dev command. Nodemon will enable "hot-reloading", allowing our server to continue running while monitoring for changes in our files — auto-restarting the server after saved changes.
Create a .env file in your root directory — a hidden file to pass environment variables and protect secure information like port numbers, passwords, database URIs.
Add in known environment variables to the .env file:
PORT=3000DB_HOST='127.0.0.1'DB_USERNAME='postgres'// default username for PostgresDB_PASSWORD='postgres'// default password for Postgres
💡 Sequelize can use a full DB_URL string, other config options can be found here.
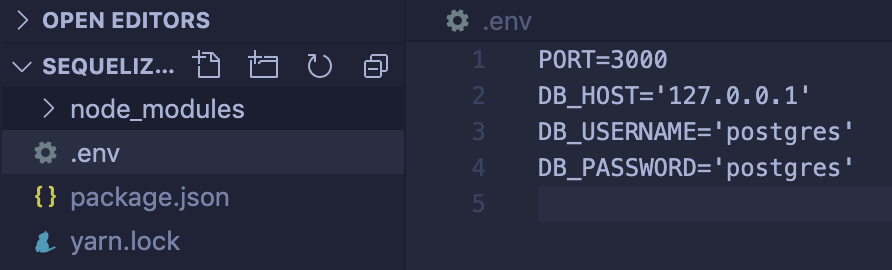 .env config
🧰 Optional step if pushing to GitHub 🧰
Run git init // Creates an empty Git repository
git init
# Initialized empty Git repository in /Users/mickey/projects/sequelize-app/.git/
Next, create a .gitignore file and add .env & /node_modules as assets that GitHub will ignore when updating your repo. By doing this step, .gitignore prevents you from accidentally uploading your hidden .env file to your repo .
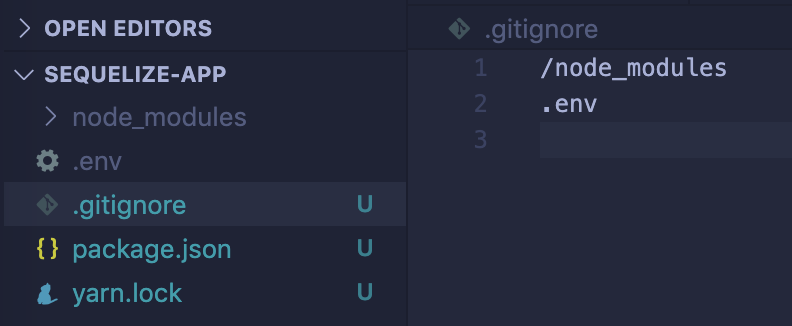 .gitignore file for protecting your assets
Express Server
Create an app.js file in the root directory, and set up the Express server:
- Require Express
- Create our
appserver - Grab the secure
PORTfromprocess.env - Set up
app.getfor our root URL ('/') - Set up
app.listen - Start our server that’ll be listening on
port 3000for connections
💡 This set up below mimics what Express refers to as the “simplest app you can create.” Read more here.
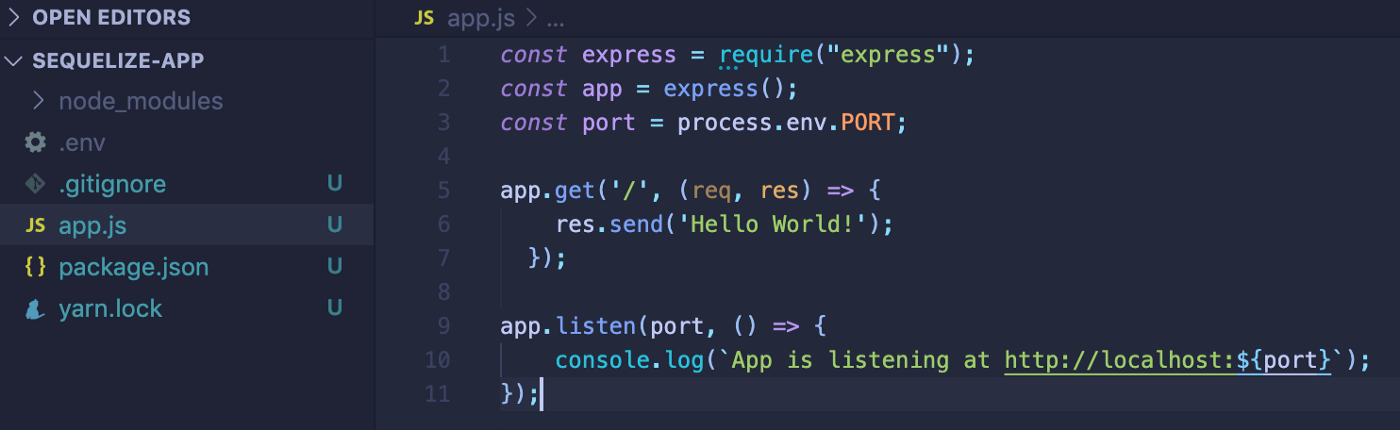
Express server configuration
Save the app.js file. Now let’s fire up our server and test our connection!
Run yarn dev in the terminal.
💡 If you’re using VS Code, you can type control + ` on your keyboard to open the terminal and run the command from there.
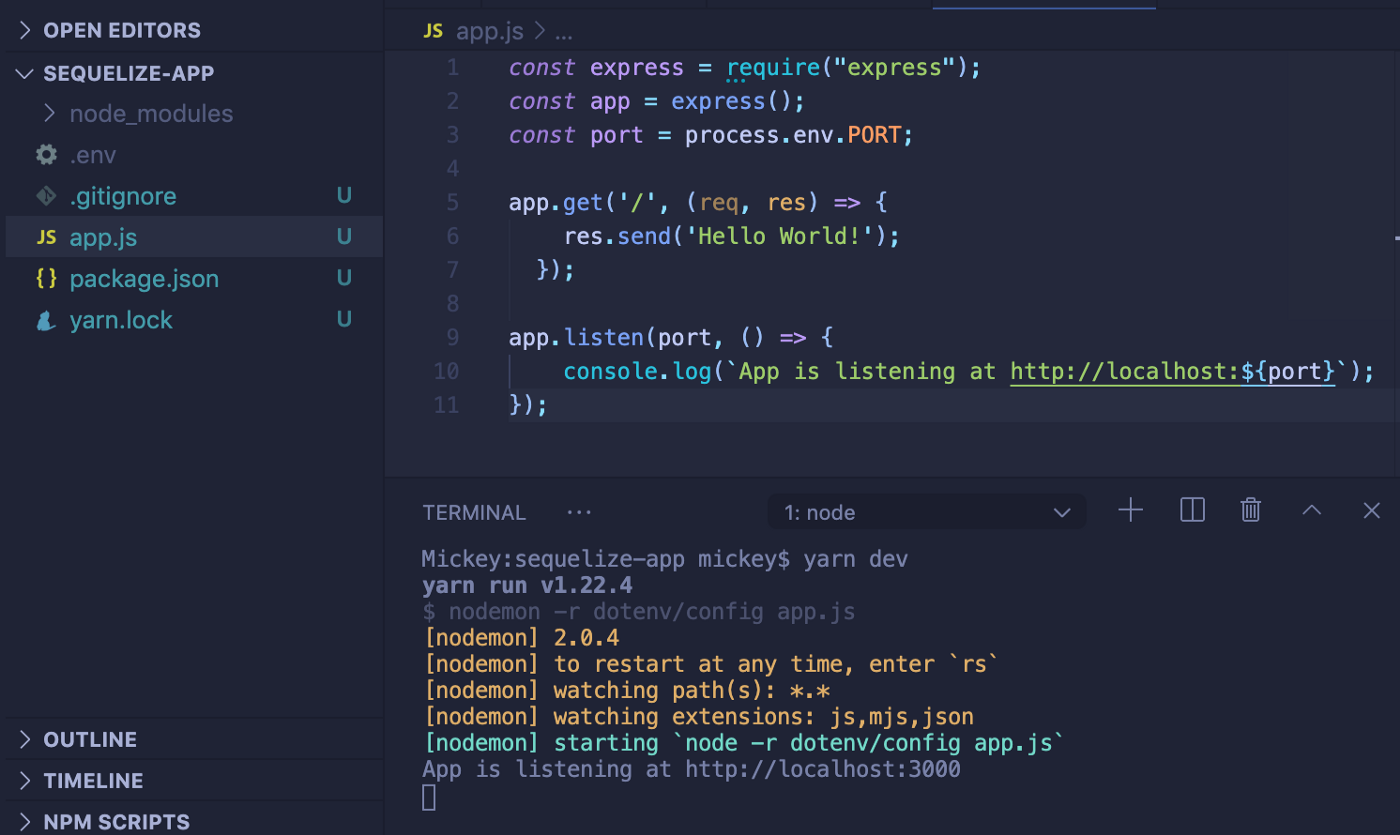
Node server running / listening from within the VS Code terminal
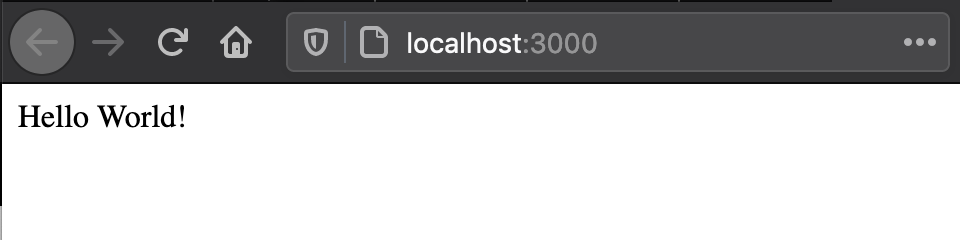
Mission control, we have liftoff 🚀 — everything is working as expected! Our app is listening 👂🏼 for connections at http://localhost:3000. If you follow that link and open a new webpage, you should see the ‘Hello World!’ message.
Install Remaining Dependencies
Let’s install our remaining project dependencies and transition to Sequelize and Postgres.
💡 To kill your server’s connection and input commands again, open the terminal the server is running on and press control + c on your keyboard.
Install Postgres — our database of choice — and Sequelize
yarn add pg pg-hstore --save // Installs Postgresyarn add sequelize --save // Installs Sequelize
Install Sequelize CLI for command-line interface migrations and project bootstrapping.
yarn add sequelize-cli -D
🥳 Celebrate, you’re halfway there! Here’s how your dependencies should look at this step:
"dependencies": {
    "dotenv": "^8.2.0",
    "express": "^4.17.1",
    "pg": "^8.3.2",
    "pg-hstore": "^2.3.3",
    "sequelize": "^6.3.4"
  },
  "devDependencies": {
    "nodemon": "^2.0.4",
    "sequelize-cli": "^6.2.0"
  }
Sequelize Project bootstrapping:
With our app configured, and the necessary dependencies installed, we can create an empty Sequelize project. To do so, execute the init command:
yarn sequelize-cli init
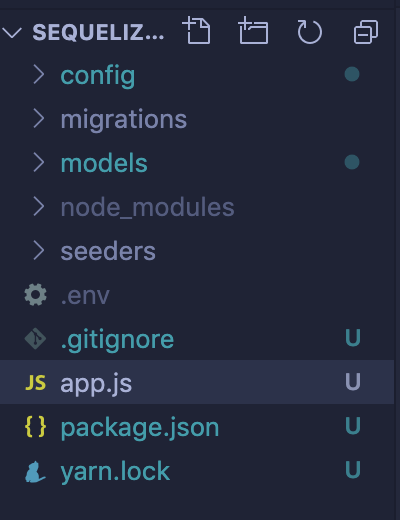
This will automatically create the following folders within your root directory:
- config — contains config file, which tells CLI how to connect with database
- migrations — contains all migration files
- models — contains all models for your project
- seeders — contains all seed files
Now that we have a new Sequelize project created, let’s get it configured correctly.
Sequelize Configuration:
We need to tell Sequelize CLI how to connect to the database. To make that happen, open the default config file config/config.json.Rename the file to config.js Add the dotenv requirement to the top of the file, and destructure your .env-- variable names from process.env:
// config.js
require('dotenv').config();
const { DB_HOST, DB_USERNAME, DB_PASSWORD } = process.env;
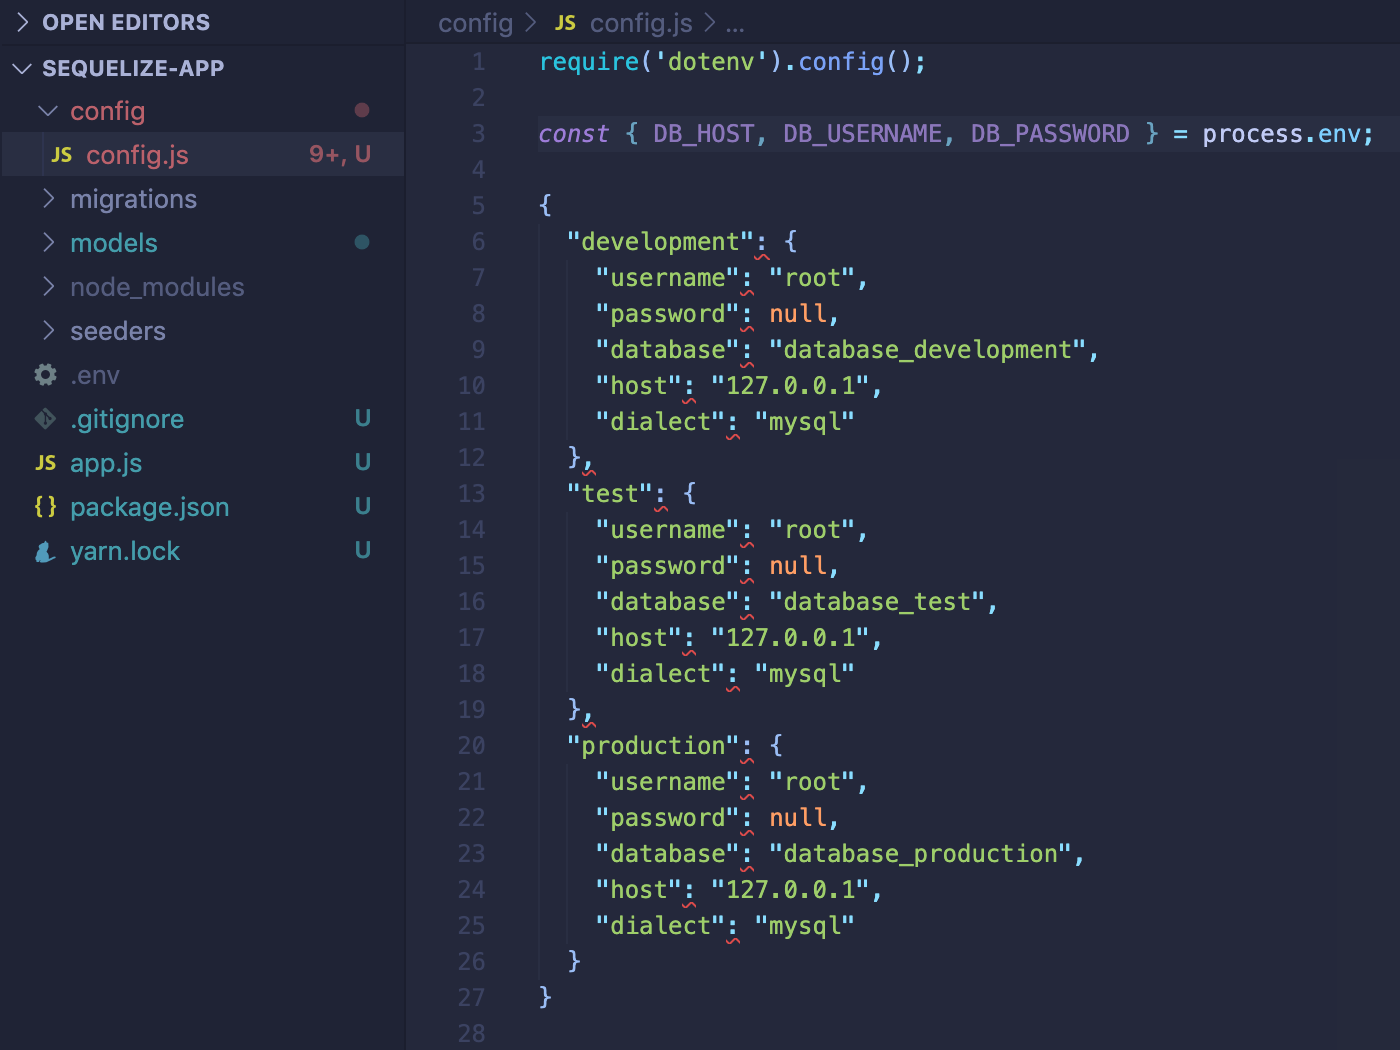
Replace the username, password, and host values for each testing environment — development, test, and production — using the variable names you destructured from process.env. Also, be sure to update the dialect from mysql to postgres.
{
development: {
	username: DB_USERNAME,
	password: DB_PASSWORD,
	database: "database_development",
	host: DB_HOST,
	dialect: "postgres",
}
// Update all 3 testing environments, not just development
🤹🏻♂ Optional step — It’s good practice to rename the databases, replacing the default names with unique enough titles that will avoid future confusion between your databases. I’ll be using:
- Development:
"sequelize_database_dev" - Test:
"sequelize_database_test" - Production:
"sequelize_database_prod"
Lastly, set module.exports to equal the object in config.js
💡 For a production configuration you may need to update with SSL and other config options found here.
Create a new database in Postgres
We’ve done all the hard work to properly configure our database, so let’s give Sequelize the O.K. to create it.
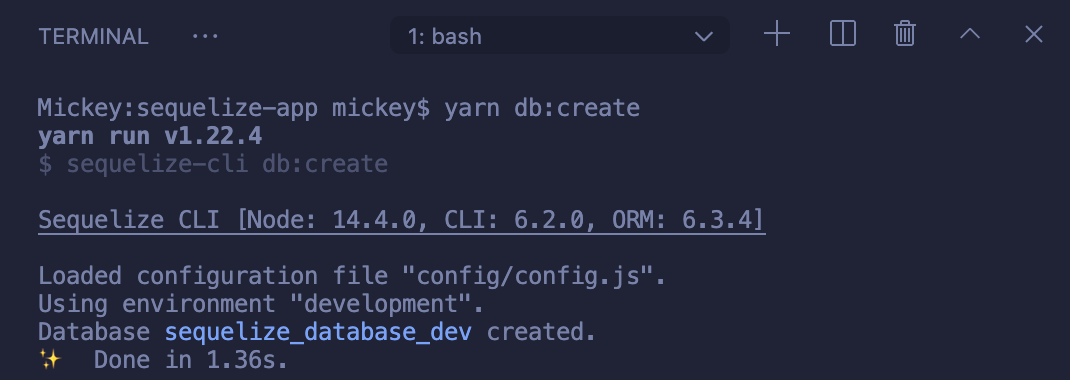
💡 Sequelize will use the default connection port for Postgres — port 5432. To specify a different port, add the "port" field to config.js. Read more here.First, update package.json and add in a db:create script:"db:create": "sequelize-cli db:create"Now we can run yarn db:create to create our new database. OR npx sequelize-cli db:create Success! We’ve created a development database with the name sequelize_database_dev.
Creating the first Model & Migration
To actually get data into our database, let’s create a model (table) for our database named User, and provide a few attributes (columns) — firstName, lastName, email.
In your terminal, run the following command:
yarn sequelize-cli model:generate --name User --attributes firstName:string,lastName:string,email:string
Or:
npx sequelize-cli model:generate --name User --attributes firstName:string,lastName:string,email:string
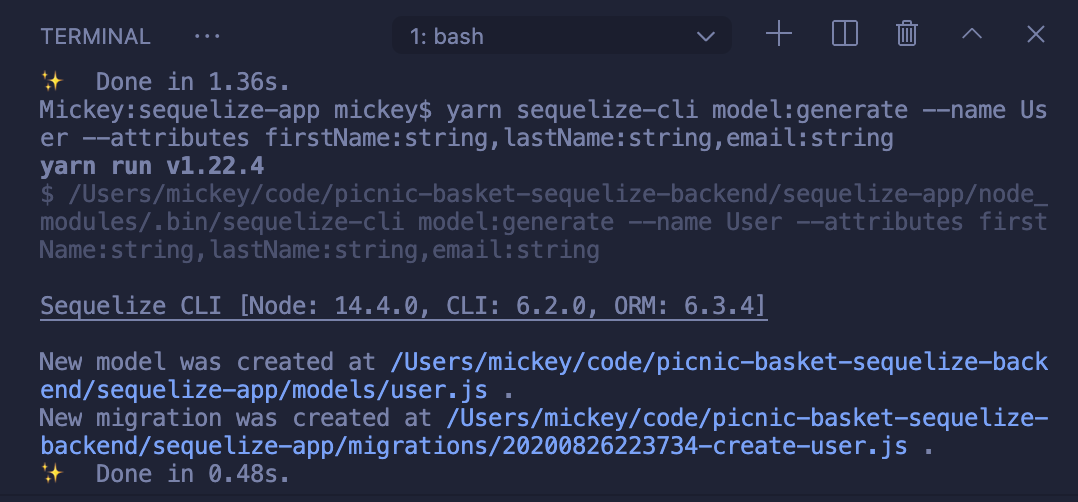
Confirmation that a new model and migration were created
The model:generate command will automatically create:
1. A user.js model file in the models folder.
💡 Models = Sequelize (App specific). Treat models as the representation of the table you want to create or update.
2. A migration file with name like XXXXXXXXXXXXXX-create-user.js in the migrations folder.
💡 Migrations = Postgres (Database specific). Treat migrations like a log of changes in the database.
Running (data) Migrations
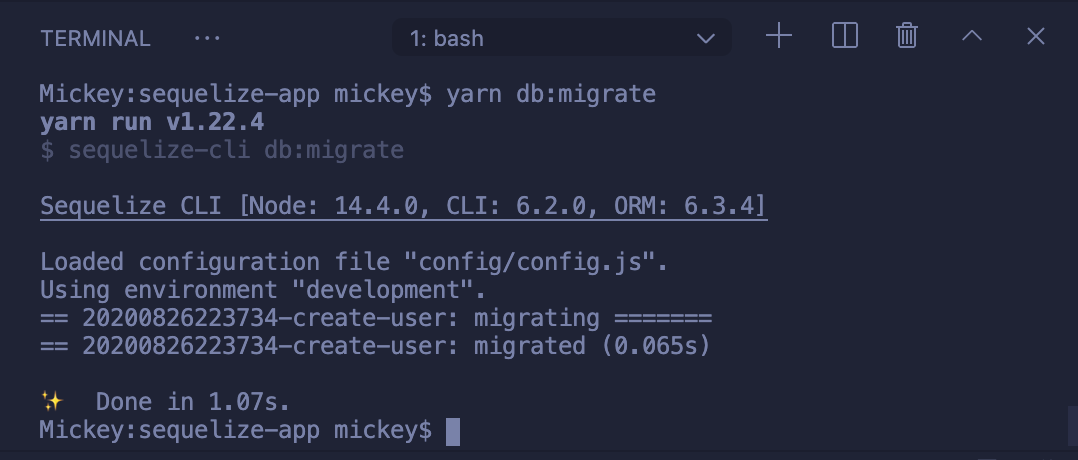
Up until this point, we actually haven’t inserted any data into the database 😳. We’ve only created the required model and migration files for our User model (table). To actually create the User table in your database you need to run db:migrate.
First, let’s update package.json and add in a db:migrate & -->db:g:migration--> script:
"db:migrate": "sequelize-cli db:migrate",
"db:g:migration": "sequelize-cli migration:generate --name"
Now we can run yarn db:migrate and send over our Users model to Postgres. (Or npx sequelize-cli db:migrate)
If everything went smooth, we can finally view our empty Sequelize model (Users table) within the Postgres database. I’m using Postico below to view the Users table.
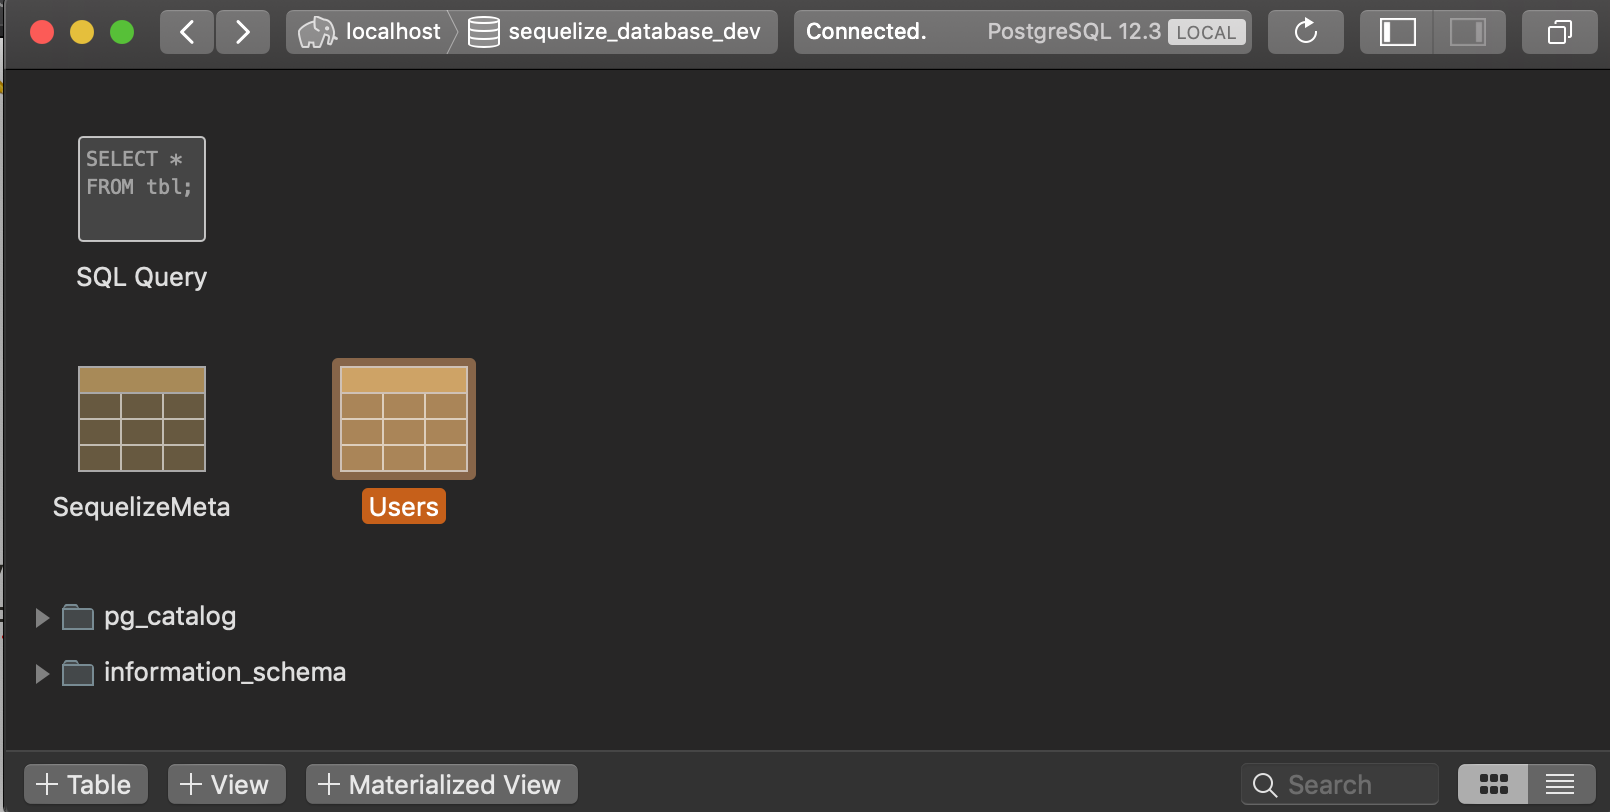
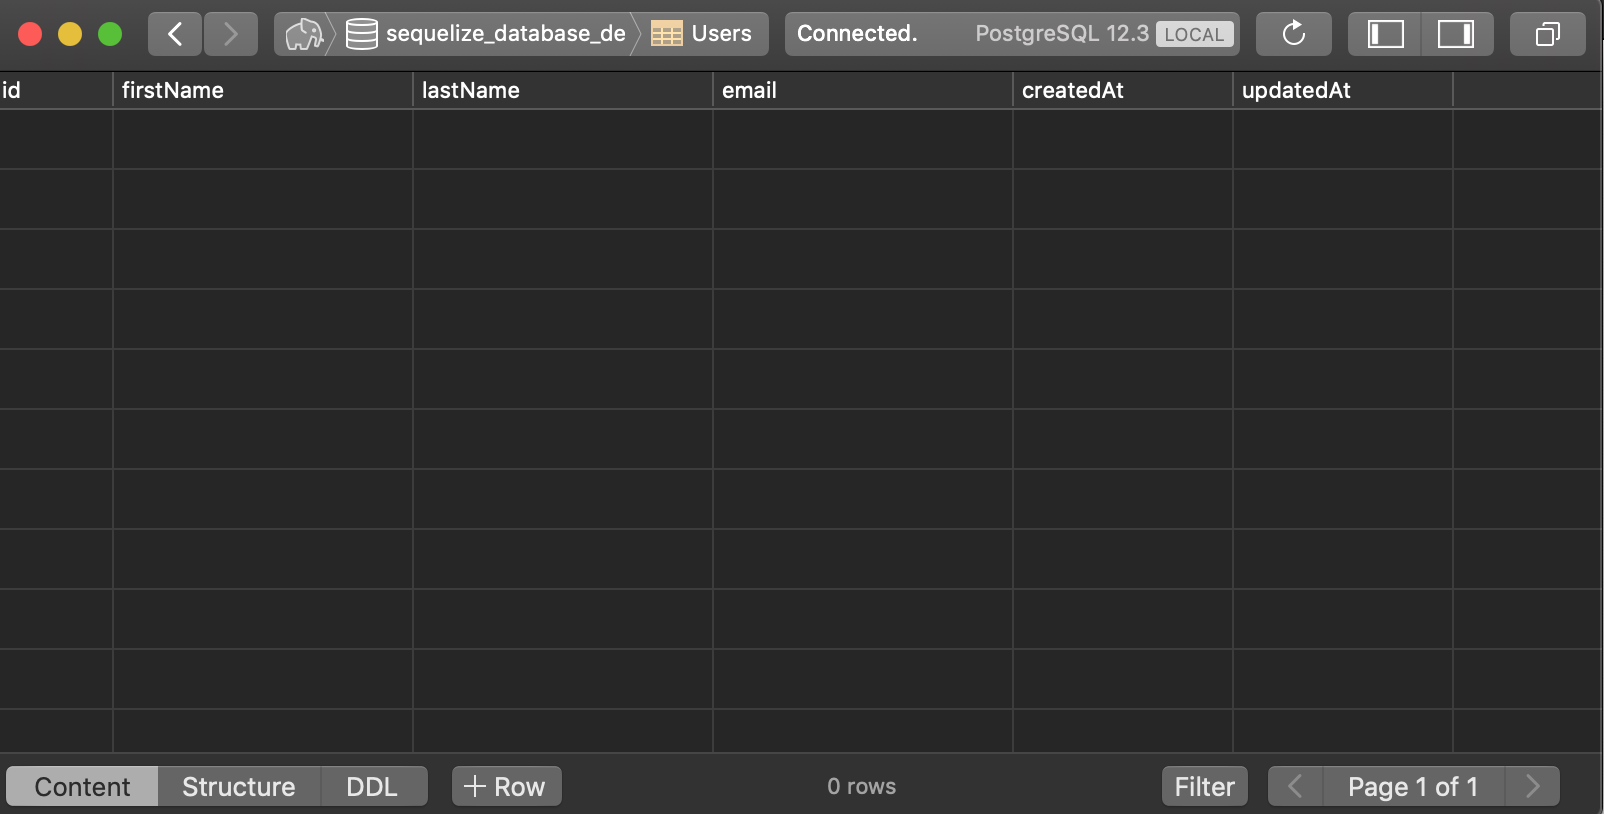
Viewing empty Users table using Postico
Creating Seeds
Let’s insert some mock data into our Users table by creating a few sample users.
💡 Seed files are used to populate database tables with sample data, so let’s create a seed file that will allow us to add a few sample users to the Users table.
Again, update package.json and add in the db:g:seed & db:seeds scripts:
"db:g:seed": "sequelize-cli seed:generate --name"
"db:seeds": "sequelize-cli db:seed:all"
Next, run the yarn db:g:seed command, adding in the desired name of the seed file:
yarn db:g:seed sample-users
Or npx sequelize-cli seed:generate --name sample-users
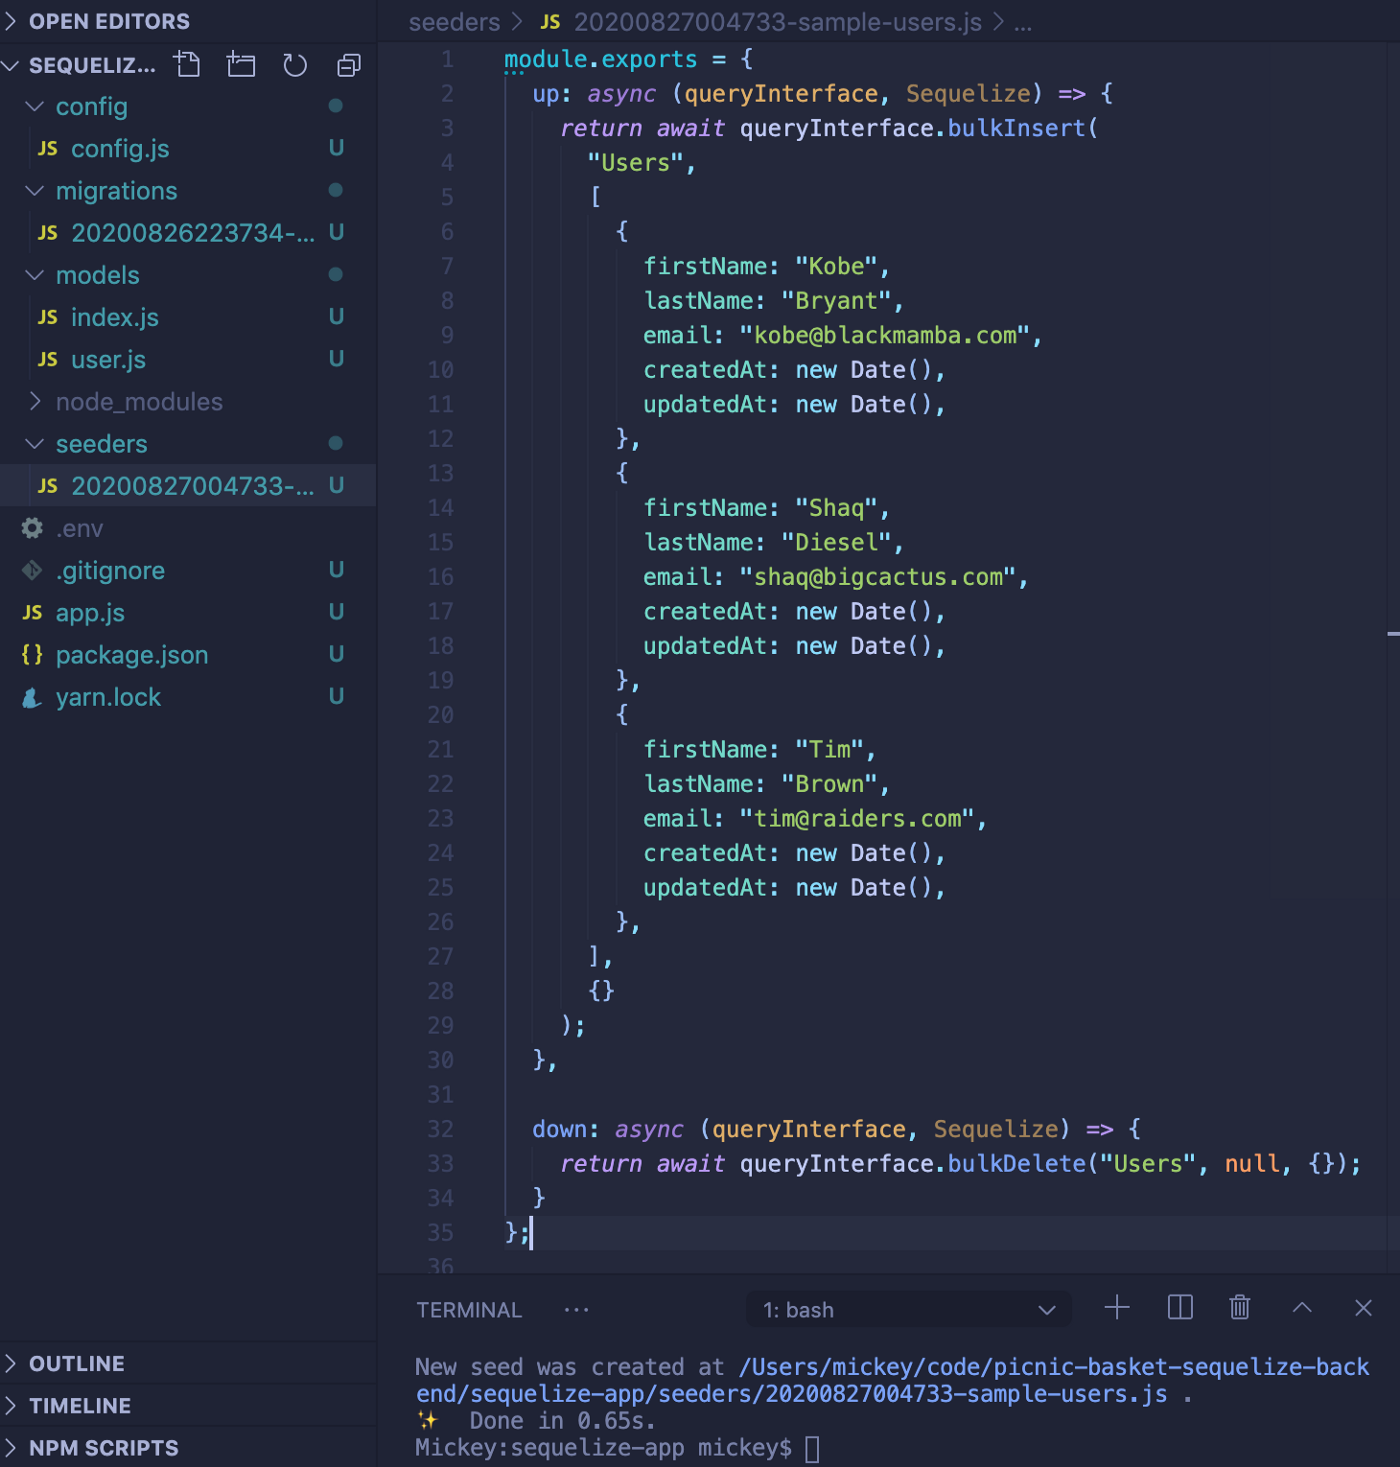
This command will create a seed file in the seeders folder. It's file name will look something like XXXXXXXXXXXXXX-sample-users.js.
Now we have to edit the XXXXXXXXXXXXXX-sample-users.js seed file so that it has a few sample users to insert into the table. Reference the image below to see how to format the up and down functions.
💡 The up() and down() functions are included in every migration file, allowing us to define our desired database changes. The up() function defines the new change, and the down() function defines how to undo the change — if needed.
Running Seeds
In the previous step you’ve only created a seed file, we still need to transfer the users to the database. To do that run the command yarn db:seeds (Or npx sequelize-cli db:seed:all)
Boooom 💣💥 ….. We’ve got some legendary users in our database!!
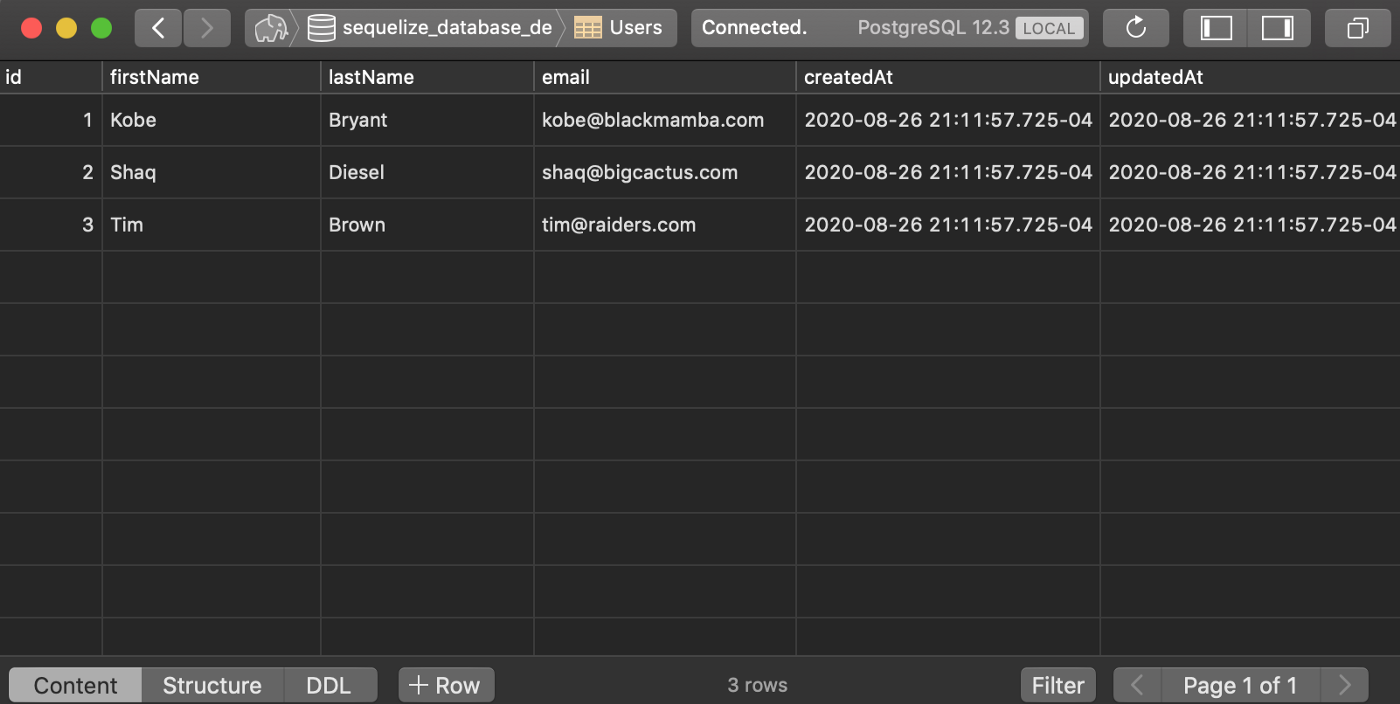
Viewing seed users with Postico
Updating your original model
After all this work, you might realize you need to update your original database structure — let’s say you need to add a new column for password on the Users table.
To accomplish this, you’ll need to create a new migration file using the CLI by running:
yarn db:g:migration addPassword
Or:
npx sequelize-cli migration:generate --name addPassword
Now that you have a new migration file XXXXXXXXXXXXXX-addPassword.js — located inside the migrations folder — you’ll need to update it to define how you want the database to change.
The same up() and down() functions we used to seed are included in this migration file. Remember, the up() function defines the new change, and the down() function defines how to undo the change.
 module.exports = {
	up: async (queryInterface, Sequelize) => {
	await queryInterface.addColumn(
	"Users",
	"password",
	{
	  type: Sequelize.DataTypes.STRING
	}
     );
	},

	down: async (queryInterface, Sequelize) => {
	await queryInterface.removeColumn("Users", "password");
	}
};
Once you’re finished updating your migration file, you should migrate the database again.
Run yarn db:migrate
You’ll also need to update your user.js file in the models folder, adding in the new column name password and it’s corresponding data type to the User.init object (see below).
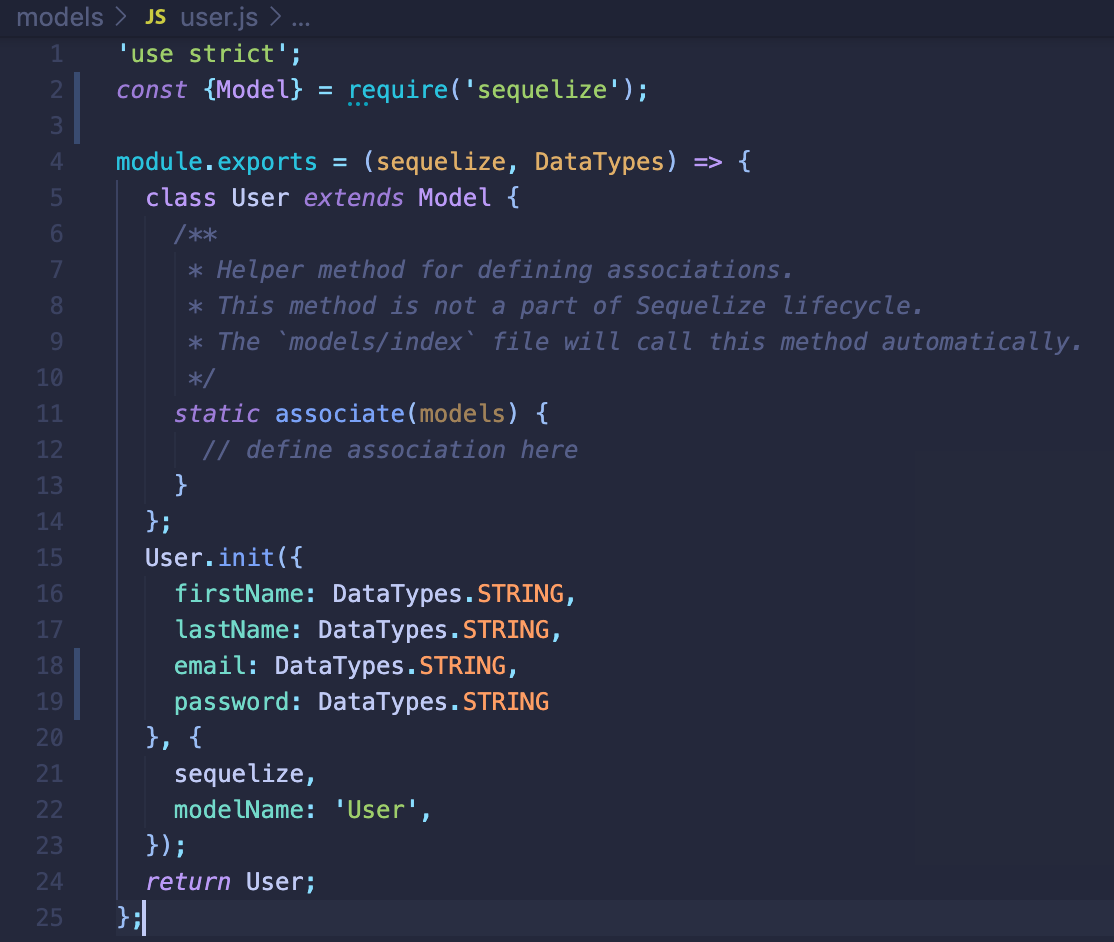
Adding the password column to user.js
Cheers 🍻
If you rode the wave 🌊🏄🏻♂️ to this point, then you’ve certainly expanded your developer toolkit! Take a moment and let all this settle in, we’ve covered a lot of information.
You’ve created a functional RESTful API using Node.js and Express, which can transmit data to a Postgres database by utilizing Sequelize to translate JavaScript into equatable SQL commands.
From here, maybe you create more tables to really see how relational DB’s work, or build out pages that have forms gathering or verifying data. Imagine a form for creating a new account and another for logging in, that way you’ll be able to test the two-way process of storing and accessing data.
I wrote this guide to be verbose, because I struggled to locate documentation that put all the pieces together in a way I understood. My hope is that this guide benefits both newcomers and Sr. engineers. We all learn and grow uniquely from the wisdom our teachers & mentors provide. What’s important is that we continue ‘forever learning’.